Your Cart is Empty


This is my 3rd custom painting. I love the paints that come with it. Never dry and always flow nicely onto the canvas. Great quality!


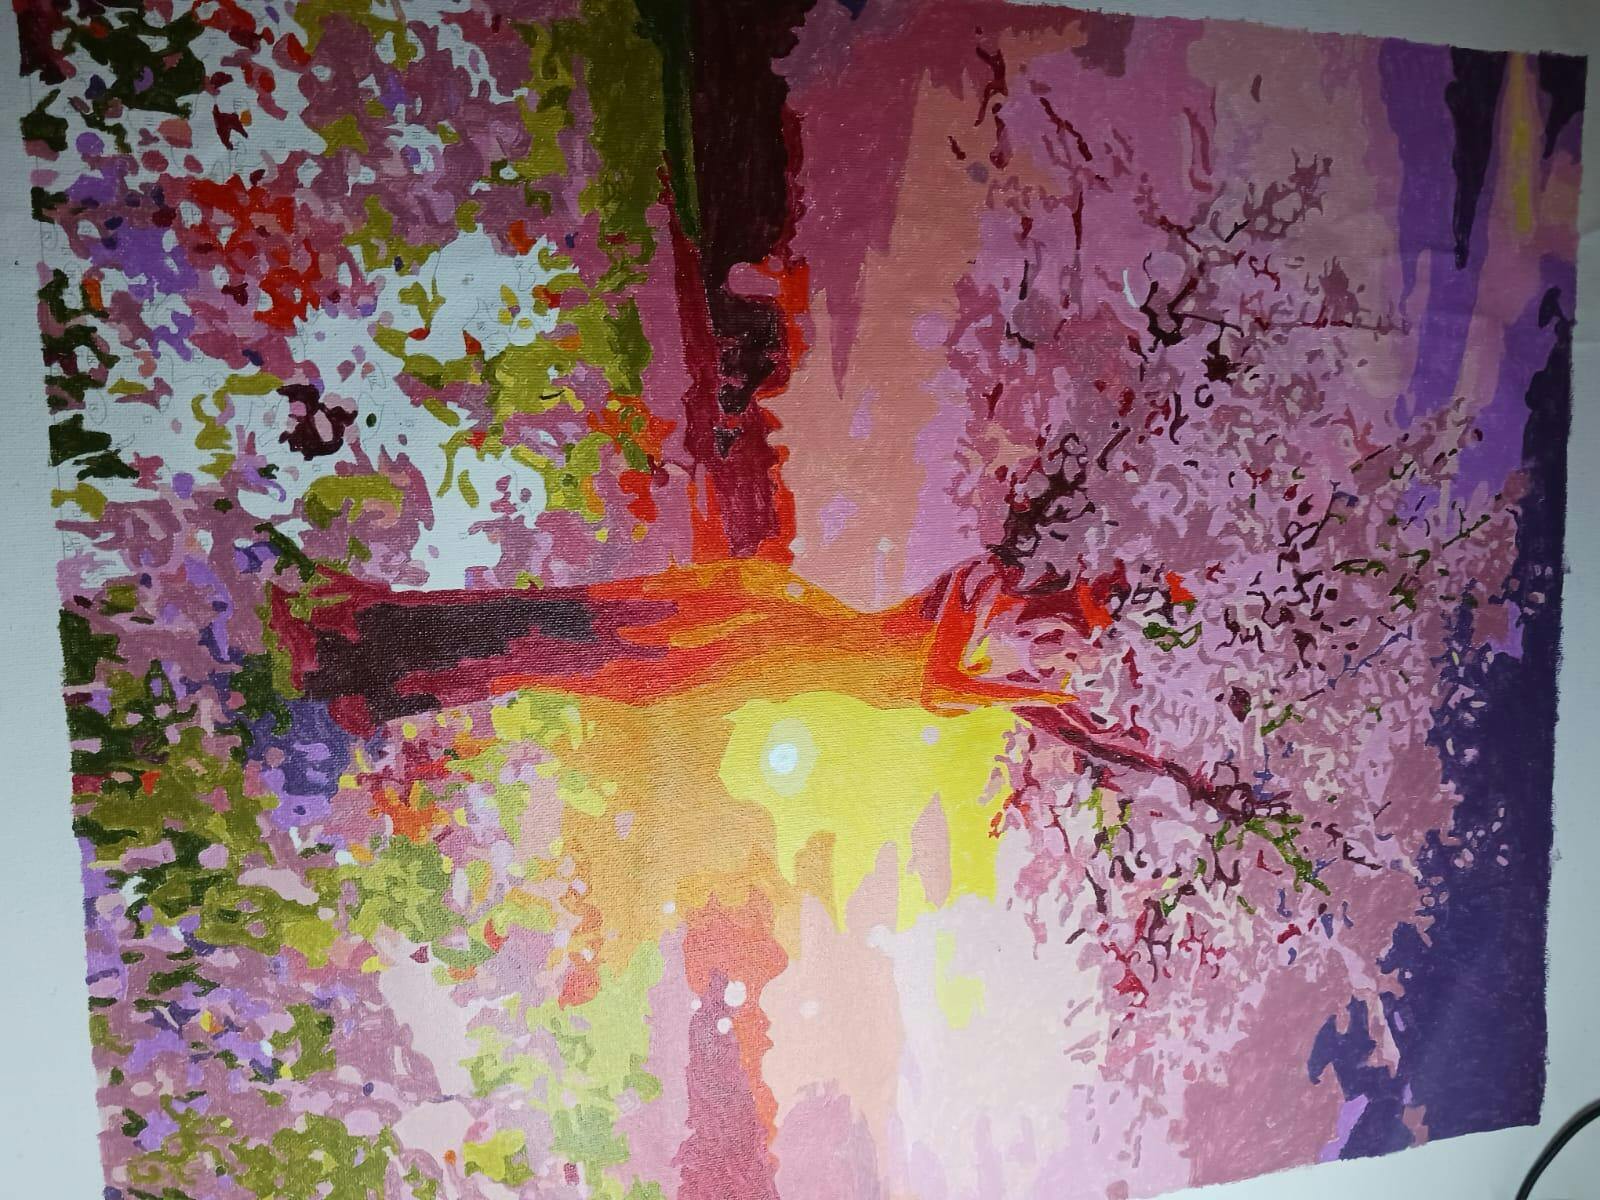
Great colors and most relaxing picture I done. Inspiring
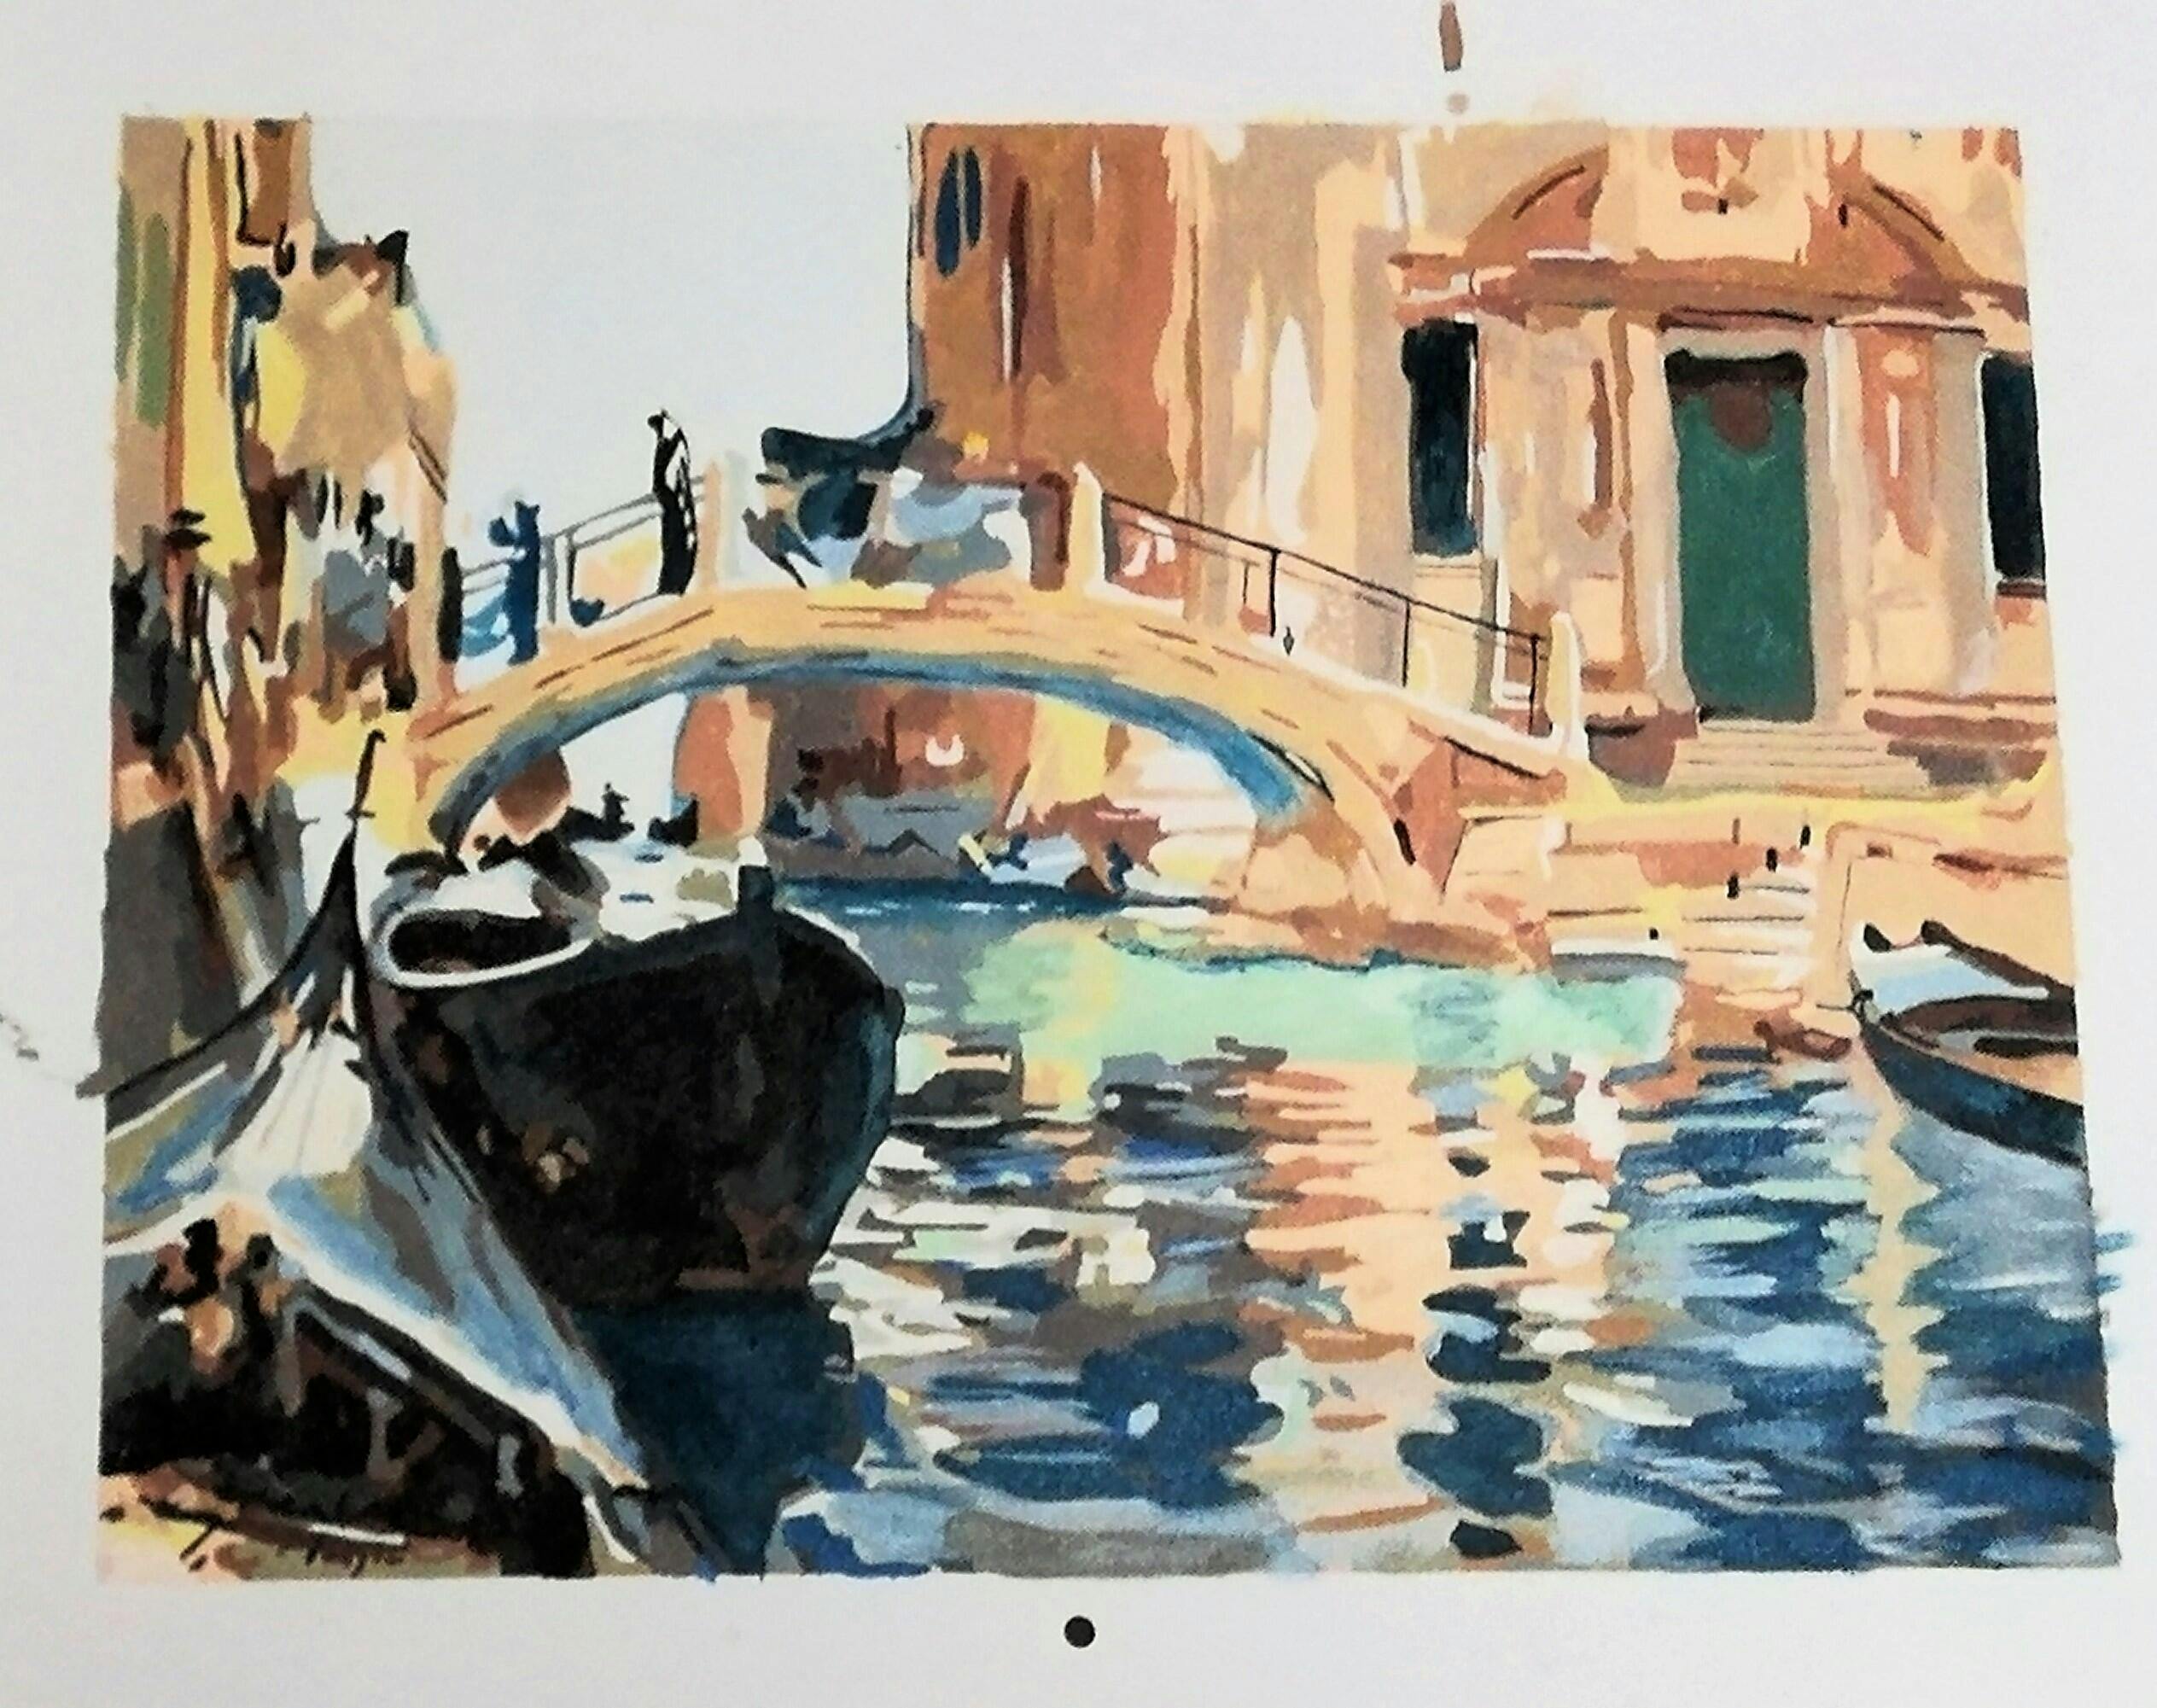
It is a beautiful paiting, but the combination numbers/colors were often very different from the original painting. That made it difficult for me to paint. I havn't finished it yet, some details still to be done,
It was relaxing to paint, not difficult so I added a few details looking at the original paiting.
b
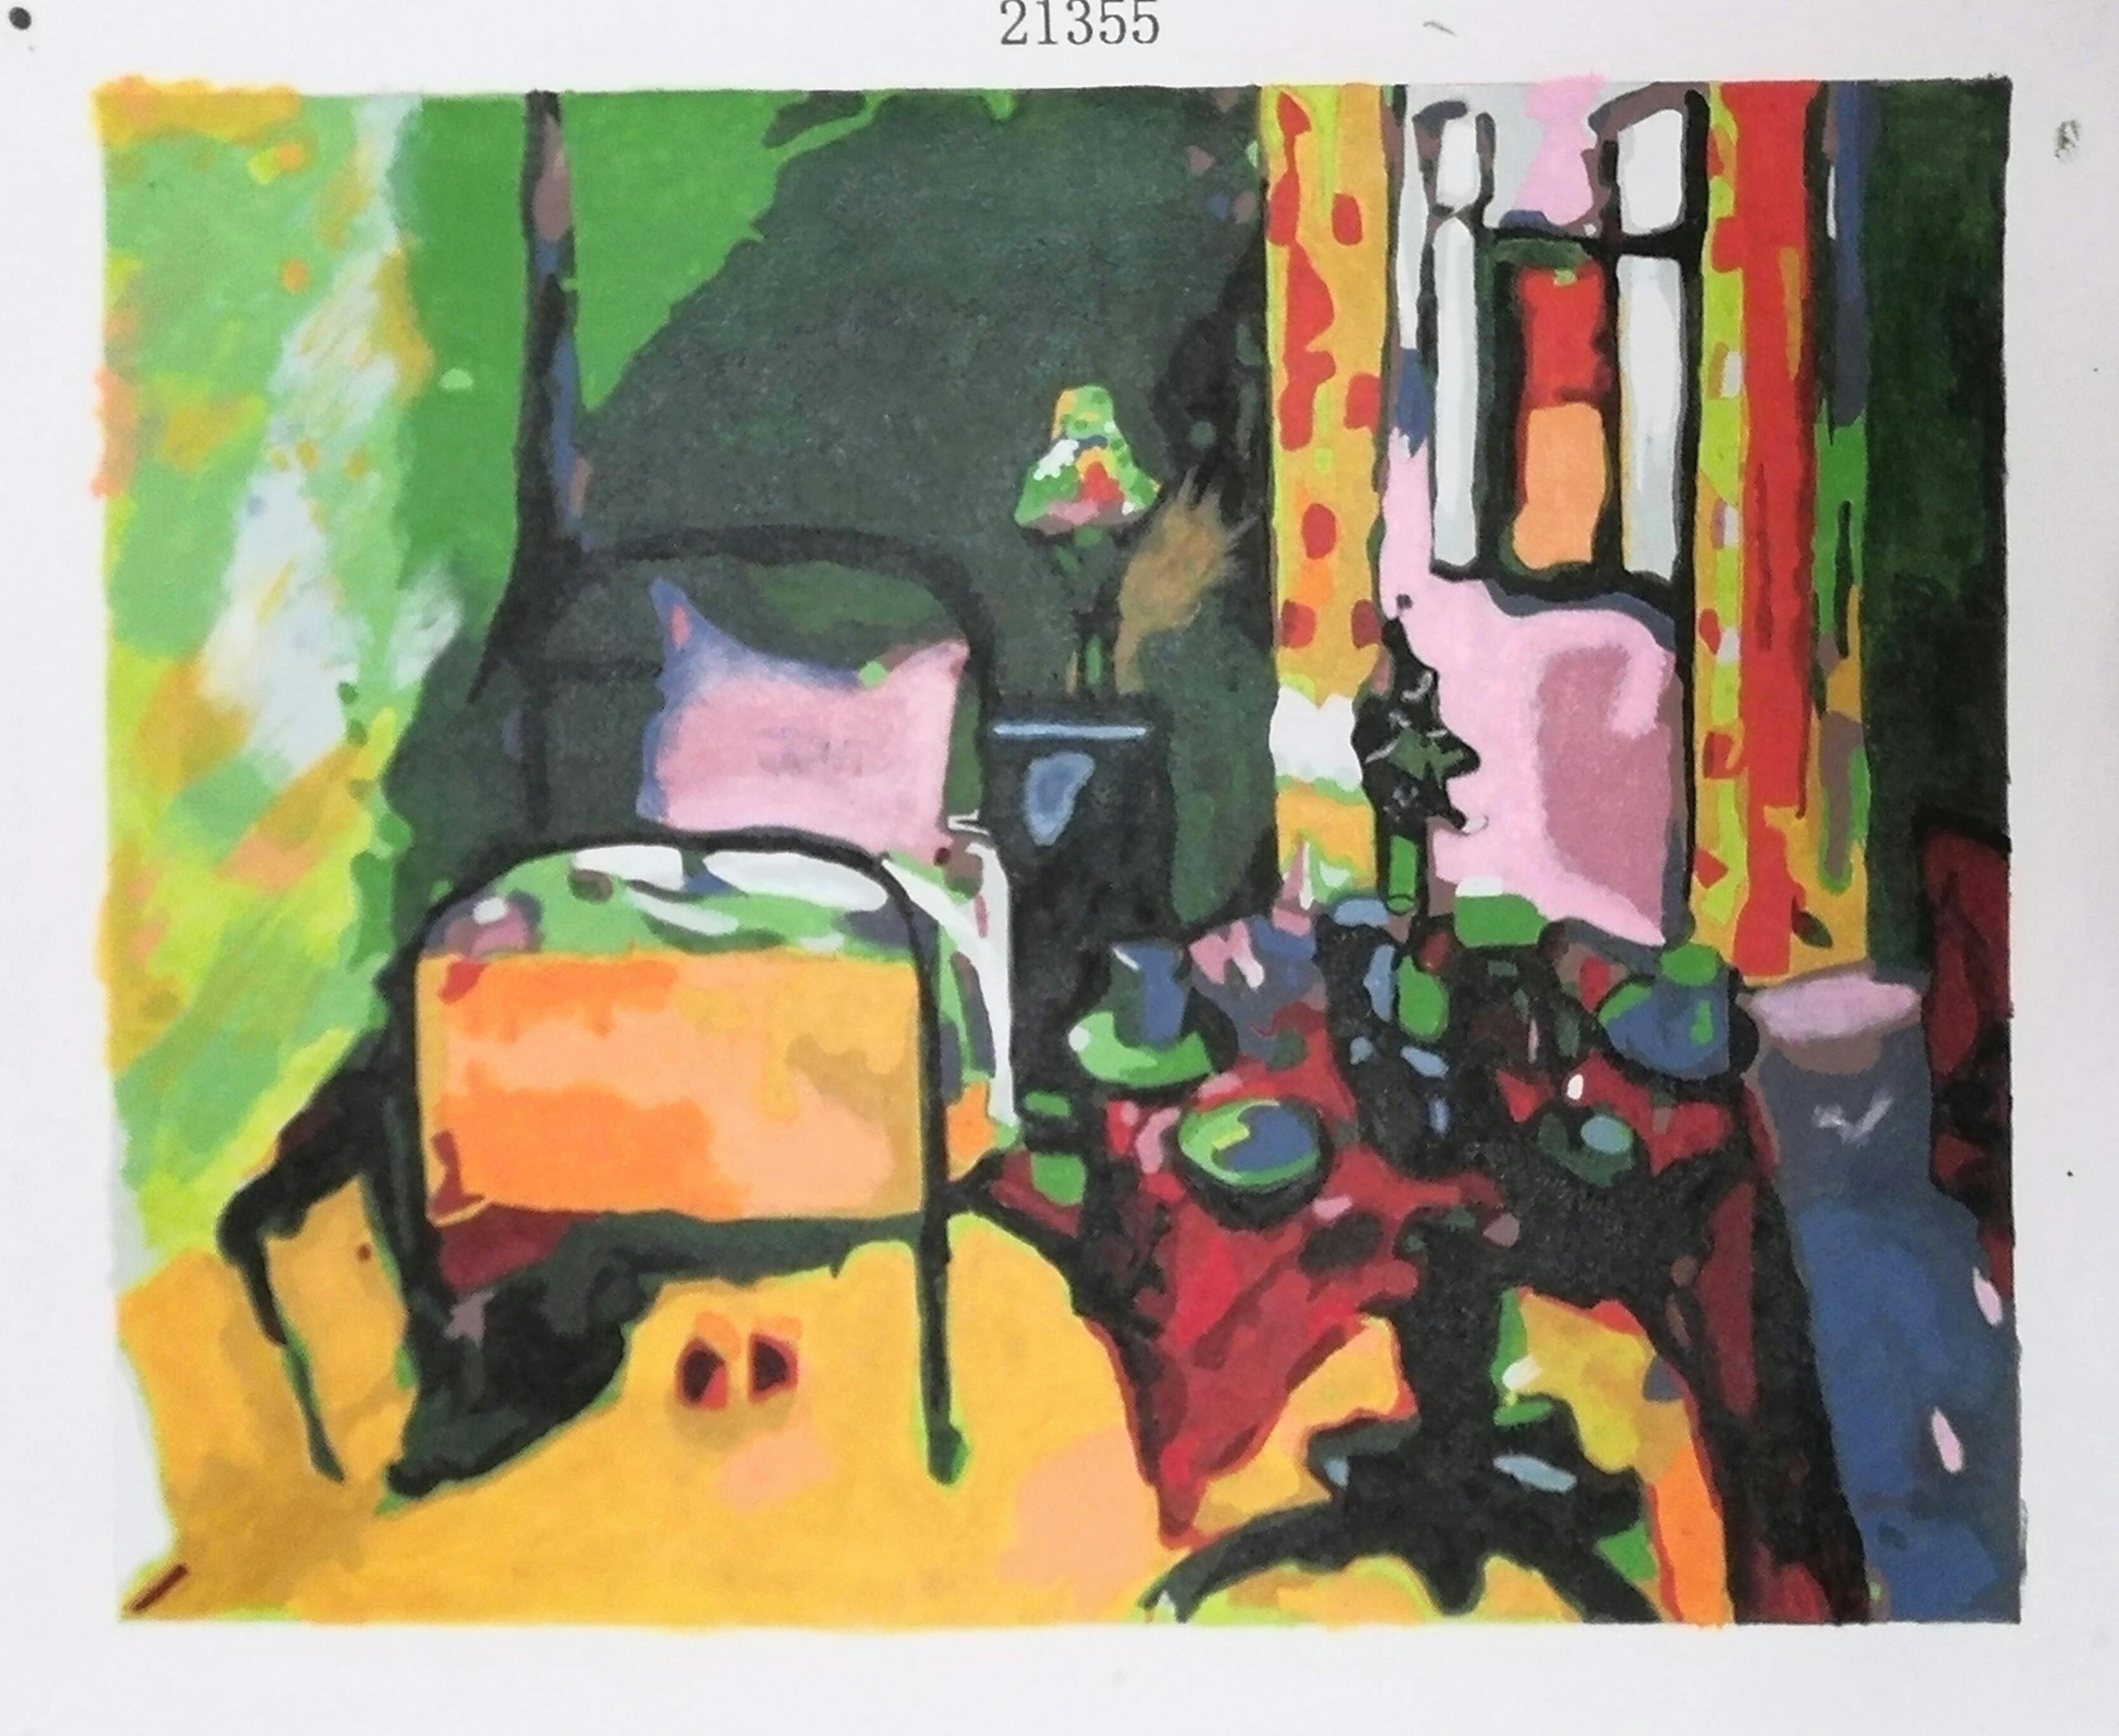
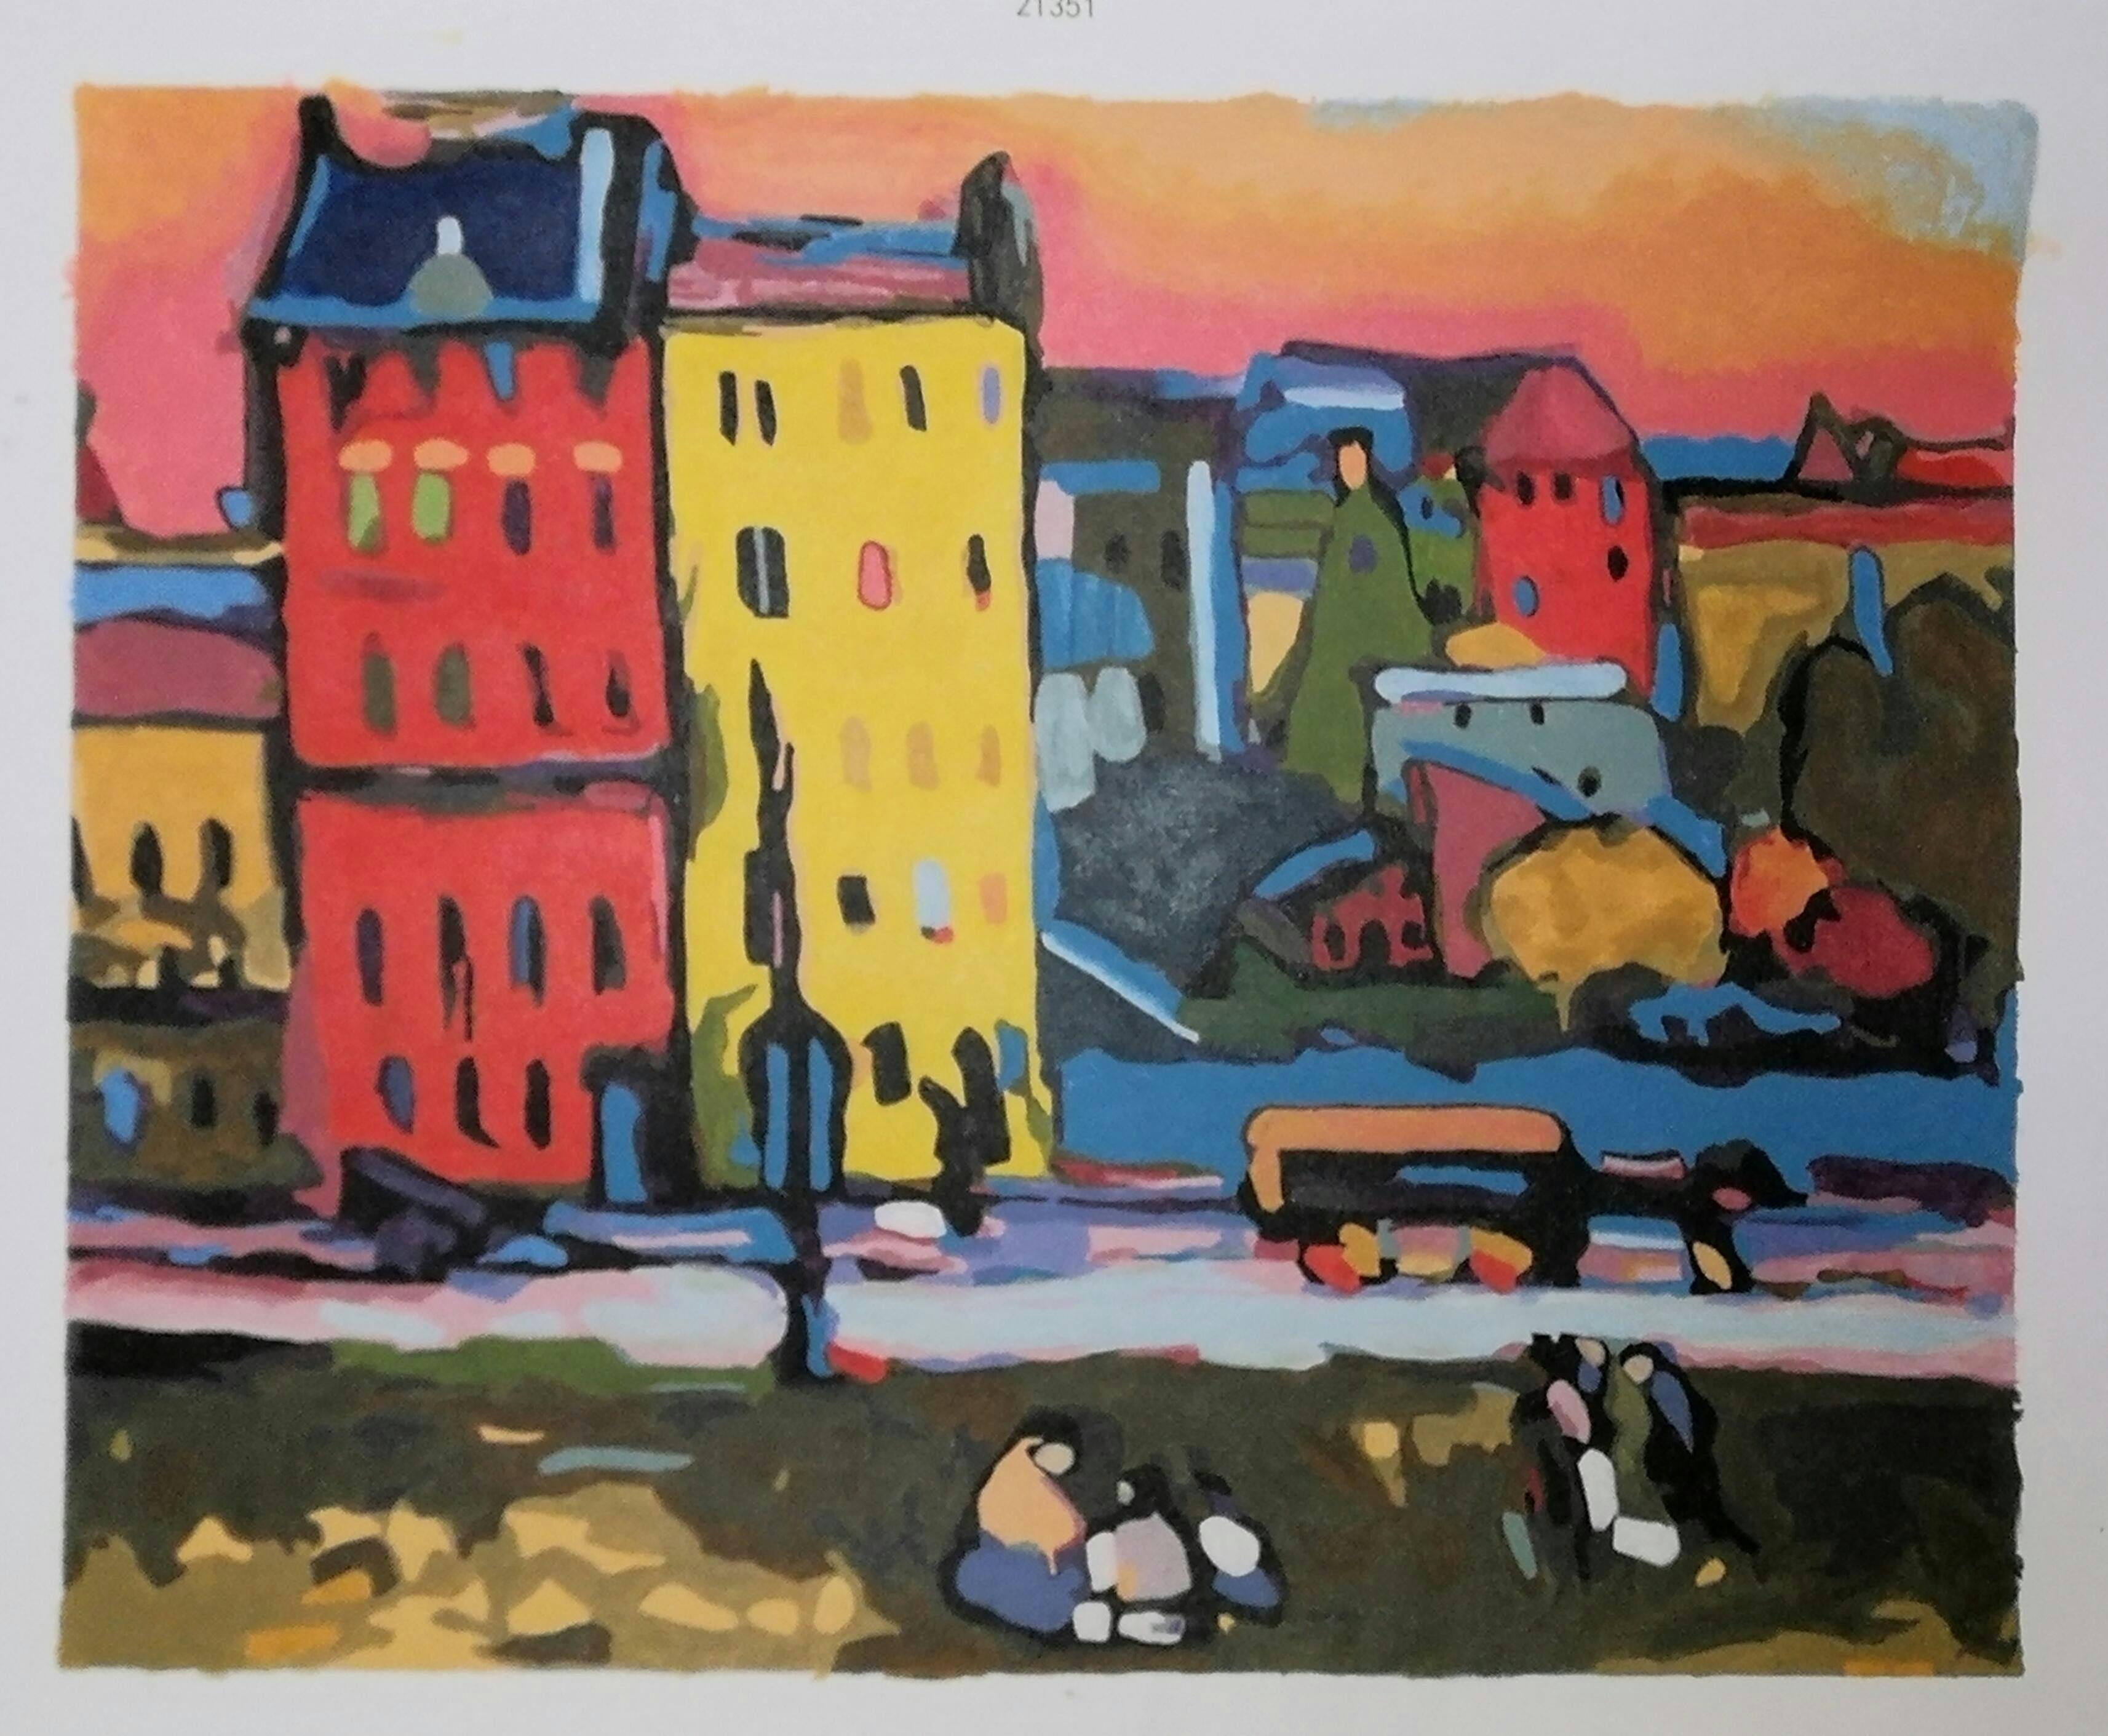
Bedroom in Aintmillerstrasse - Wassily Kandinsky - 1909 I liked very much this painting, I did change some things after the original painting. Colors were fine and also the rest!